Findmypast Family Tree – one year old this week!

Findmypast Family Tree – one year old this week!

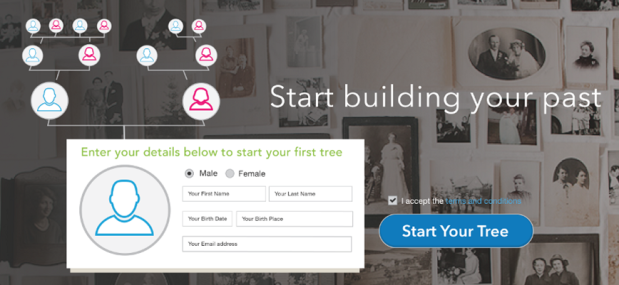
Before you start searching for records. Before you start looking at transcriptions or images. Before you subscribe or invest any money. You will want to start building your family tree and recording your ancestral heritage.

For the last 18 months Findmypast have been working hard to build a new Family Tree builder that is clear and simple to use, but also includes advanced features for more experienced genealogists. But more importantly, is FREE to create and keep, no matter what the size, no matter how many images you want to attach, and also regardless of whether or not you have a subscription.

We appreciate that members want to build trees for a variety of reasons. Whether that be to add colour to one’s ancestral stories and past. Whether that be to solve historical puzzles or prove or disprove the family myths. Or whether that be just to create a lasting legacy for your descendants. There are many more reasons, but we also want the experience to be fun, and free from stress.

This week is the 1st anniversary of the launch of the new Family Tree builder on Findmypast. And we’re pleased to say we’ve come a long way in that time, and appreciate that there are still many more things we need to include, but now is a really good time to come in, take a look and start building YOUR family tree!

There are two options on getting started with your family tree. One is to start from scratch, normally with yourself on the Create a Tree page, or if you already have a tree created online or in a desktop product, you can export a GEDCOM file that can be uploaded to Findmypast.

Once started, there are four main views of your tree.

Screen Shot 2014-09-26 at 15.15.07

The Family view which shows a focus person, their parents, siblings and children, aunts and uncles, cousins along with spouses and children. This can be quite big!

Screen Shot 2014-09-26 at 15.15.48

The Pedigree view is more traditional and shows a focus person, and then 3 generations of ancestral parents, that is parents, grandparents and great grandparents.

Screen Shot 2014-09-26 at 15.16.11

The Family Group view shows focus person, spouses, children and parents of both the focus person and their spouse(s).

Screen Shot 2014-09-26 at 15.16.31

And finally, and the view you will probably end up using the most, the Profile view. This is like a personal page for each relative you have in your tree, and great for seeing all the detail of a person in one place.

Screen Shot 2014-09-26 at 15.16.53

This page is split into several tabs, but starts with something akin to a covering sheet. It’s an Overview page that gives a small glimpse into the bulk of the information you will end up collecting about each person.

Screen Shot 2014-09-26 at 15.17.08

The Timeline lists key events in the persons history, including events such as their birth, marriage, children and sadly, when they passed away.

Screen Shot 2014-09-26 at 15.17.21

The Things to investigate panel gives you a link to search results for your ancestor that has been optimised for the best results across all Findmypast records.

Screen Shot 2014-09-26 at 15.17.32

There is even a calculate relationship feature, that lets you find the relationship between any two people in your tree.

Screen Shot 2014-09-26 at 15.40.59

On the Fact & events page, you can add unlimited facts about a person, with over 100 core fact types, and the ability to create custom facts. These facts help to paint the story based timeline feature seen on the overview. In addition, you can attach to any fact unlimited sources, photos, notes and links to other people.

Screen Shot 2014-09-26 at 15.42.32

You can upload photos and attach to people or events. You can even attach the record transcriptions and images to people so that they can be referred to as sources and linked back easily from the profile pages.

Screen Shot 2014-09-26 at 15.19.54

To help you manage some of the data in your tree there are lists covering the people, facts, master-sources and more.

We have a number of features in the pipeline, including hints and record merging, sharing your tree with family and friends, but kicking off the birthday celebrations, we have given the tree a new lick of paint so to speak. This new look has been carefully designed to make it clearer and more colourful.

We hope you like the fresh new look, and hope you enjoy building your family history with the Findmypast Family Tree.

FamilyTree - start building

Phil Moir

Technical Lead – Findmypast Family Tree Team

Attach Records – new feature

The second piece added this week to the jigsaw, more commonly known as the Findmypast family tree, was the ability to attach records.This has been eagerly awaited by many users, and in fact was one of the highest voted for tree features on the http://feedback.findmypast.co.uk  forums. The concept is simple. You find a record transcription and / or image and you want to save them to your tree, or more specifically attach them to the relevant person(s) in your tree. Either for a permanent record, or to review and merge data later.

AttachRecords - start your search

There are a number of places where you might start searching for records, but for this example, lets start with the profile page of someone in your tree. This also gives me the chance to mention some improvement tweaks we made to the “Search” link in the Things to investigate section. Following a great 4 part series of blog posts by Randy Seaver about the Findmypast family tree at http://www.geneamusings.com/2014/08/family-trees-on-findmypastcom-post-1.html, we took on board his suggestions and tweaked this link to give the best search for a person across all Findmypast records. I thoroughly recommend trying this as the starting point for any general search of people in your tree as this will not only bring up the obvious record sets, it may well uncover the less obvious.

AttachRecords - search results

Without any need for filling out complex search screens, we’re taken straight to the most likely matches for our person. Note that these results open in a new browser tab. There is good reason for this as it lets you flip back and forth between records and your tree. From the example shown, we’ve got two probable matches at the very top of the results.

AttachRecords - view transcription

In this instance, I’ve clicked through to the transcription.

AttachRecords - attach to tree

Next to the Print and View Image buttons, is a new Attach to tree button. The button also appears at the bottom of the page, as well as on image pages. At the moment, this option is not available on articles from the British Newspaper Archives. Click on the button to open the attach modal window.

AttachRecords - attach modal

The attach record to tree modal is fairly simple. However,if you don’t have a tree already, you need to go back to the tree builder to create one. If you only have one tree, then the name of the tree will be shown.

AttachRecords - select tree

If you have multiple trees, then a tree selector is shown. It is important to pick the right tree, as only people from the selected tree will appear in the following type ahead. Of course, this does not stop you from selecting from one tree and then from another. Just remember to switch the selected tree.

AttachRecords - person name type ahead

After selecting the tree, just start typing in the person(s) field. You can use any of the given names, surname, nickname or even the year of birth or year of death. When you see the person you want in the list, just click on the name.

AttachRecords - private note

The name will appear highlighted, with a cross beside it. This allows you to remove it from the list, if you selected in error. You can always detach a person from the record at any time later. You can also attach as many people as you like to any record. After attaching the people you want, there is also a separate section to add a private note about a record, that is only relevant to your tree.

AttachRecords- confirmation

After clicking on the Save button, a confirmation box will appear indicating that you have successfully saved the record to the selected person(s) or from who you have detached the record. Close this window to return to the record. Any time you return to this record this information will be available. And you can add, edit or remove the attachments and notes later.

NOTE: Remember to attach both the transcription and the image to your tree.

AttachRecords - attached media

When you return to your tree and the profile for a person you attached the record to, click on the Media tab on the Profile page. Here you will find the attached record. You can click through from here directly back to the transcription or image. You can also now attach the record to specific facts and events, by using the attach existing option when adding media.

This is obviously a very popular addition with over 18,000 records and images now attached to trees. So what are you waiting for? Time to start trawling the massive collection of records that Findmypast has, and attach them to your tree.

Let us know what you think of this new feature and how you would like it improved.

Reagrds

Phil

GEDCOM Export – new feature

This week saw two NEW and exciting features being launched for the Findmypast Family Tree. This one is the second phase of a long term project to integrate the GEDCOM standard protocol for transferring your tree data between the Findmypast Family Tree platform and other genealogy packages. Findmypast appreciate that some users are familiar with other packages, and each one has different benefits, and all the mainstream desktop and online Family Trees offer GEDCOM compatibility for both importing and exporting trees, and we’re very pleased to now join this group. We are also aware that many users want to take personal backup copies of their data to store offline, or they want to share their tree with people who use other products.

So to complement GEDCOM import which we launched back in February this year, we have now launched GEDCOM export. The export release corresponded with some tweaks to the GEDCOM import to capture some data fields that we had missed, and the export process itself aims to return all the data that was included from an import, even though not all of the data in some imported GEDCOMs is shown yet in your Findmypast tree.

ExportGEDCOM - tree list

To kick off the export, go back to your tree list. You can reach the tree list by clicking on the View all trees menu item.

ExportGEDCOM - export tooltip

You will now see a new icon, slotted in between the tree settings and delete tree icons. This is the export option. For the moment the process will export your full tree in GEDCOM 5.5.1 format. No need to worry about this detail, as most applications that support GEDCOM will match this.

ExportGEDCOM - preparing gedcom

While the export process is running, your tree will be locked, so you cannot access and make changes. Don’t worry, the export is pretty fast, so you shouldn’t have long to wait.

NOTE: The process runs on the Findmypast servers in the background so you don’t have to stay on this page while the export is created. If you have a large tree, feel free to go and do more record browsing, and when you comeback to the tree list, the status of your export will be shown.

ExportGEDCOM - creating gedcom

Also while the process continues, you will see the tree status message update to give you an indication of how far through the process the export is. If for any reason, the export hits a problem, the tree will be unlocked and you can continue to work on your tree. Meantime, the Findmypast technical team will be aware of the problem and this will be investigated.

ExportGEDCOM - gedcom ready

When the process completes, the tree status will indicate that the export has been created and howlong it took. The tree will become active again, and a new link will be shown under the tree icons on the right hand side.

ExportGEDCOM - download link

The “Download tree” text is the link to physically download the file to your local computer. Click on this, and depending on your browser the file will either automatically save to your Downloads folder or you will be asked where to save the file. This is where you will be able to find the file when you want to import it to another package or to re-import it back into Findmypast.

ExportGEDCOM - file downloaded

The download tree link will remain visible until you alter the tree again, so don’t worry about it disappearing in the short term.

NOTE: Please be aware that while Findmypast make every effort to import your full GEDCOM file and then re-export the same without any loss of data, you may find some data loss when importing to and exporting from other family tree packages. If you do notice any data loss during the Findmypast processing, then please feel free to let us know and we’ll get it fixed as soon as we can.

We’re also looking at other tweaks to the export, and more will be posted on that when they are available.

Thanks again for reading this blog.

Phil

PS The second feature released this week was “Attach Records”. I will post about this later.