Lost in the Woods

I’ve been looking at the viewing statistics for my blog, and despite the dust and tumbleweed blowing down the deserted main street, the page views are on the up. There still seems to be a purpose for this blog, and people are finding the content of interest. That certainly pleases me, but also shames me.

woods-768753_640To cut a long story short, at the end of 2015 I left the Findmypast organisation, where I had led the technical team both for Genes Reunited and the Findmypast Tree, and my motivation for genealogy dived. Thus the abrupt end to my blogging. 😦

Earlier this year, I had some time off from work, and managed to delve back into building my tree(s). Incredibly after all these years, we realised that we’d never researched my father’s grandparents and so my enthusiasm was rekindled, and we discovered some wonderful new stories.

But I also took the opportunity to explore this new avenue using all the usual websites for genealogy research, Ancestry, MyHeritage, Findmypast and TheGenalogist.

And I have reconfirmed to myself the conclusion that when researching UK focused ancestry and building your tree, then one site stands heads and shoulders above the rest, and that is Findmypast. The depth of records they now offer, and the quality of the hints that are provided on the tree, along with the straight forward hint/accept/merge process is second to none.

My only reservation in trumpeting this out too loud is that since the end of 2014, when the Tree team were disbanded at Findmypast, the tree feature has been left to stagnate. Incredibly, features that were almost complete, or had been prototyped back then, have not been finalised and rolled out. Items such as private tree sharing, hints across trees, media searching, media viewing and hinting, WhoDoYouThinkYouAre media view of your tree, etc.

Despite not knowing what the future may hold, and therefore making recommendations that your tree is safe long term on Findmypast, I would be keen to know if writing articles on how to get the best out of the Findmypast tree would still be helpful.

Let me know, and also suggest what you’d like to be able to do on the tree. Maybe you already can, it just needs to be explained. I would love to write some more articles on getting the most from online tree building and genealogy researching.

Maiden names, marriages and parents

During my recent webinar for Findmypast First, which will be available at http://www.findmypast.co.uk/video-library very soon, and after chatting to family history enthusiasts at Who Do You Think You Are Live, a number of questions were asked on a variety of subjects. I will be writing a series of blog posts to cover the questions and will offer my best advice to answer them. In this blog, I’d like to cover the discussion point of using maiden or married names, multiple marriages and multiple parents.

When creating a family tree should I use married surnames or maiden names?

In general, I would recommend adding all people to your tree with the name they were born with. Therefore in the case of women who married, enter them with their maiden name. The primary reason for using this format is that automated searching, hints and tree to tree searching will be improved as we can locate records that match maiden names, but we can also infer the married name when looking for marriage and death records, when a spouse has been linked.

More about names

However, please remember that the tree is flexible, and you can enter an unlimited number of name facts against a person in your tree. The primary name is the Full Name fact, and this one is used in all displays across the tree. If you add a Nickname fact, then this will be included in the name displayed across the tree, and will be shown in double quotes. There are other name fact types, such as Married Name (most people don’t bother to include this because you can infer this from the spouse, but if you want to include it then that’s fine, especially if it is coming from an official source).

maiden-name-nickname

Profile showing maiden name and nickname

The other name facts include, Also Known As, Maiden Name, Other Name, Phonetic Variation and Romanised Variation. You are not able to create custom name facts.

In terms of sourcing names, if there are variations in the spelling, I would personally recommend saving these as “alternative” Full Name facts along with any relevant sources. Then you can always refer back to where exactly all the different name variations came from.

If a woman has been married more than once what is the best way to see her maiden name and other married names?

If you are using the “maiden” name as the primary Full Name, then the tree will always display this across all views. If you choose to include married names, then I would recommend including these as Married Name facts. You can always go to the Married Name fact usage report to see what married names have been applied.

married-name-fact-usage

Use of the married name fact, showing the person and the married name under description

If you do not know the maiden name for a woman should it be left blank as previously I used ‘unknown’?

It is up to personal preferences. I personally leave unknown given names (first names) and surnames (last names) blank if I don’t know them. Some programs like the Genes Reunited tree put Unknown automatically into your tree when a surname is not specified. I think it helps when searching to leave it blank so that any search engines are not restricted to names like “Unknown”. This reminds me I need to clear up the Sarah in the example above.

How do you show multiple parents in the case of adoption?

This is very similar to a couple of questions I’ve had from a support request. (1) How do I add an adopted child to a Family Tree? and (2) How do I add Adopted Parents to a Family Tree already showing child & biological parent?

The Findmypast tree does not offer a straight forward way to add a second set of parents but it can be done. There is a good reason for this, and that is because it helps prevent people adding multiple parents accidentally. Therefore as soon as yo have added a mother and father, we don’t offer these in the normal add relative modal.

However, we do realise that some people want to build a family tree, and show that a person has both biological parents as well as parents who through adoption or fostering (or for various other reasons) , so this is how to do it.

add-biological-parents

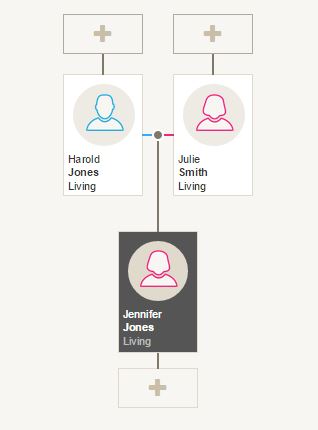
Standard one set of biological parents on Relations tab

Start by creating a person and then add parents as you would normally do. Go to the relations tab, and you will see that the first set of parents have been created a biological parents.

add-new-person

Add an unrelated or unconnected person to your tree from People list

You can then add an “unattached” person to the tree, via the People list page. And then go their Family View (only one person on show) and you can add a relative (spouse or child). In this case I’ll add a spouse first and then add a child after.

select-parents-for-child

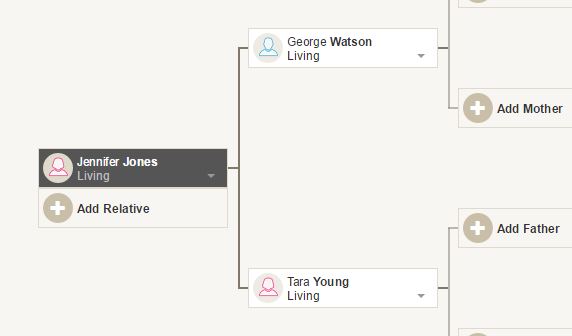
Select the parent or parents

You’ll be asked to select the parents for the child. In this case I select George and Tara.

add-new-child

Add a child, but choose “select someone from your tree”

At this point you’ll be presented with a new person form. But don’t enter details. Click on the link at the top of the form that says “Select someone from your tree”. You will have the standard person search form, and in this select the child you want to attach to the new parents. In this case we choose Jennifer Jones (who already has biological parents added). Now don’t be worried that the family view has not added Jennifer. This is because these are not the primary parents.

person-search

Search for a person in the tree

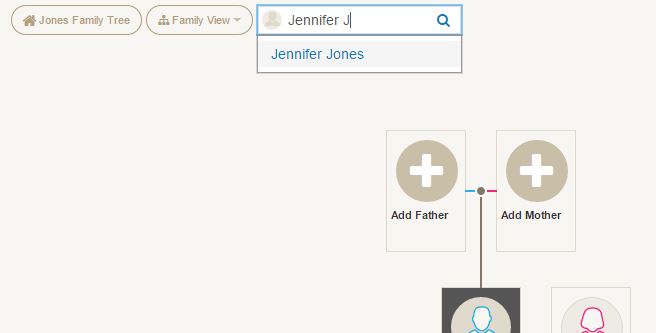
If we use the person selector at the top to search for Jennifer  Jones, and then click on the name that appears in the result, it will switch to Jennifer Jones’ Family View.

preferred-family-view

Only “preferred” parents include child on primary views

Now we can switch to the Relations tab under the Profile View, and we can see both parents listed.

multiple-parents

Two sets of parents show on the Relations tab

The second set have not had the relationship selected, but we can edit this here.

relationship-options

List of relationship options

All the views, except for the Relations tab, will only display the preferred parents. To switch the views to use the other parents, then go to the relations tab and change the preferred parents to the alternative ones. Do this by selecting the “Set Preferred” option under the Parents label on the left.

The preferred parents will always show on top on this tab, and will have switched over when you clicked the set feature. When you look at all the other views, they will now display with the adopted parents (in this case).

preferred-parents-changed

Adopted parents now showing by default

I hope this has helped clear up a few queries about names, parents and setting relationships. If you have any questions, feel free to add a comment at the end of this post. I will update this blog if anything needs further explanation or more detail.

Thank you for reading, and if you haven’t already been tempted to, please click to follow my blog and be informed when new posts are available.

Who Do You Think You Are Live 2015

Just wanted to post a quick update from Birmingham, where the 2015 Who Do You Think You Are Live show is being held. It has been a great first two days, with the Findmypast stand very busy. In fact the first day was so busy, a few of us didn’t even get a chance to take a break during the whole day.

findmypast-stand

It is great to see so many people turning out and with such enthusiasm despite everyone having brick walls to break down. We, and I mean the family history community, may not be able to solve all the puzzles that are coming our way, but we’re certainly having fun trying. It’s really the first time I’ve had a chance to demonstrate the power of the tree and hints together, and show how to ignore search and let the tree do the searching for you.

I’ve had the chance to present my Introduction to the Findmypast Family Tree a couple of times so far, and looking forward to the final presentation tomorrow. I’m afraid it’s not ground breaking genealogy comedy like that provided by Tony Robinson, but it will give you a very good insight into the Family Tree tool we now have available on Findmypast. And I’ve got to introduce the new release of Hints which includes Census records from all over the UK, Ireland and America.

Today I managed to escape the stand for a couple of walkabouts, taking the opportunity to explore some of the other amazing products and services that are on offer to the family historian, and I will blog about some of these in the future.

But for now, with one more long day to go, I need a little rest.

I haven’t forgotten about the questions that came up from the webinar (which I will link to as soon as it is publicly available), and I will start to blog them next week, along with a few repeated requests from visitors to the stand, such as how to export your GEDCOM from other websites, how to upload media to the tree and what is the security on the tree.

Best wishes and thanks for reading, Phil

I’ve lost my tree!

“I understand that you are having problems with your tree and believe you have lost all the people that you have entered.”

Every week a see a few requests come in with the same panicked concern. I’ve lost my tree. My tree has disappeared. In almost every case this is far from the reality and the solution is usually quite simple, but it is understandable for someone who is not entirely familiar with the Findmypast family tree tool. I thought this was about time that I posted instructions on how to resolve this. The following is a copy of an email I sent to one customer, but the advantage of this blog is that I can add plenty of screenshots.

~~~

I can reassure you not to worry. Your tree is still in tact. I suspect you had just moved the focus to a person who was either at one end of your tree or had been disconnected.

lost-my-tree-1

let’s say that I am going to work on Stephen

Quite often when working on a tree you add a few people, and then at some point you remove either a connecting person or a connecting relationship.

lost-my-tree-2

turns out Stephen was not Lucy’s brother so I’ll remove him from the family

This may leave just one person visible on your screen, and the temptation is to fear that the whole tree has vanished.

lost-my-tree-3

“Oh! Where’s my tree gone?” – please, please do no panic

There are two quick ways to check that this is not the case.

lost-my-tree-4

your history of the people you’ve worked on and home person at bottom

The first is to switch back to the home person. To do this click on the third oval box from the left at the top of the tree view. This is a history of people visited in your tree, and the bottom one is always the home person. Click on this and the tree will reset back to this person.

lost-my-tree-5

back to home person

The reason that the tree does not do this when you reload each time, is because most people when working in their tree on distant branches want to jump back to the last person they worked on when they reopen their tree, rather than having to navigate back on each occasion. But jumping back to the home person is so easy by using the history link.

lost-my-tree-6

link to people list

The second way is to select the People list from the bottom of the second oval box from the left at the top of the screen. This will tell you firstly how many people you have in your tree (the main reassurance that your tree has not been wiped) and then list the first 20 people. You can filter, sort and page through this list, and the buttons on the right hand side of each person row let you jump to the Family, Pedigree, Group and Profile views for that person.

lost-my-tree-7

check people count, and jump to a person

I hope this proves helpful.

Thanks again for reading my blog, and please tell anyone else that uses Findmypast or has considered using Findmypast to take a look at our tree software. It doesn’t cost anything to build your tree, no matter what the size is.

Duplicates on Findmypast Family Tree

Creating a family tree is not an easy task, and the software packages that are available on the market that let you build and store your family tree try to be flexible, but that flexibility can sometimes lead to confusing situations. The issue we sometimes here about with the Findmypast family tree is “I have a person duplicated on my tree”, following the user seeing a screen like one of the two following.


duplicate-1

“duplicate” situation when selected as focus person

duplicate-2

same “duplicate”, but as shown when not selected as focus person

Actually, this is not a duplicate person at all, despite the family view displaying as such. In almost all the cases I have investigated, the duplication relates to the ability to create multiple parent situations, and it is the family to child relationship that causes the problem.

We, at the Findmypast Family Tree team, are aware that in some certain circumstances merging hints that offer lots of relationships can create this issue if you’re not careful with the merging process. It is also possible to add a child to an existing person and instead of creating a new person, you can select an existing person including someone already existing as a child. And thirdly, we realise that even if you do have genuine reason to create multiple parents (such as biological and adopted), we should only show the preferred parents in the family view. All these issues are being worked on, and hopefully will be resolved soon.

In the meantime, if you do come across this situation on your tree, it is really easy to clear up, and I hope to demonstrate how in this blog. First, from the Family view where you see the “duplication” of a person or group of people, click on one of the duplicated names, and select the Profile view.

duplicate-3

When you get to the Profile view, switch to the Relations tab.

duplicate-4

The Relations tab is very helpful as this shows you all the parents of the currently selected person. It will display multiple parents if entered and lets you choose which you want to be the preferred set. When the Family view bug is fixed, this will be the deciding flag indicating which set should be shown, so that you can switch between biological and/or adopted for example.

For each set of parents, you can also see which children are attached to which. And you can “unlink” people from relationships here.

Then you have all the spouse and again all the children for each spousal relationship.

And finally there are other families. These are families that contain any of the parents of the current person, but not where the focus person is listed as a child. This will normally include step-families, etc.

duplicate-5

In our “duplication” example, we can see the original set of parents, and the other children, but only Rita has been created with another set of parents. And in this case, the second set of parents is actually the same father, but with no mother listed. This is the relationship I want to correct. Be aware that maybe the preferred set of parents were wrong in Rita’s case, and for such a correction you would choose to remove Rita from the family which will be explained later.

For the moment, let’s see how to clear up the second parental relationship that is causing this “duplication”.

duplicate-6

Firstly we want to remove the parent or parents from the family relationship, BUT only if it’s not going to be needed anymore. This will be the case if there is going to be no more children left and the parental relationship never really should have been in your tree. To remove a parent, hover over the top right corner of the person box where you will see a broken link icon. The tool tip will say “Remove from this family”, although it will let you remove the person completely. Click on this icon.

duplicate-7

You are given the option to remove the person from this family only or completely from the tree. We just want to remove them from this family so we click on the top link.

duplicate-8

Just to be sure you are doing the right thing, we ask you to confirm this action. Click on the remove button to complete it.

duplicate-9

This leaves us with Rita still attached to the family unit, although the parents have now been cleared from what will become an obsolete relationship. Now we want to remove Rita from the family. Not the tree. Don’t misunderstand this action. Remember this is not a duplicate person,s o deleting Rita will delete her from everywhere. Again, top right corner of Rita’s box you will see the remove from this family icon. Click on this.

duplicate-10

In my example, Rita is the Home person for the tree, and the delete completely from the tree does not show. In all other cases it would. We do want to remove Rita from this family, so click on the link.

duplicate-11

Again, you are asked to confirm this action. Click on the remove button.

duplicate-12

Now we see only one instance of Rita, with one set of parents. Just what we wanted. And flicking back to the Family view.

duplicate-13

Just one Rita highlighted on this diagram too. Success.

I know in an ideal world, you’d never get to a chance to fall into this trap, or we could get restrictive and limit you to only ever one set of parents per child or not let you select an existing person when creating relationships. Chances are that we be even more frustrating, and you’d end up creating real duplicates across your tree to deal with the limitations.

We continue to do our best to negate the obvious negatives situations, or at least warn you, but I’m hoping that this article helps you resolve this situation should you encounter it.

My final top tip of advice for this scenario. If you find that multiple children are duplicated to a set of parents, then delete the children after the parents, but in an order that leaves the focus person to last.

I’ll be back again soon with answers to the webinar questions.

Thanks for reading.


Findmypast First webinar on family tree

This week I posted my first contribution to the Findmypast First series of webinars, and it was no surprise that I gave an introduction to the family tree. I thoroughly enjoyed the experience, recording it in advance, and then while the webinar was running live, we dealt with a constant stream of questions and comments. It was a real shame we didn’t have time to answer everything. My genuine thanks to all who watched and those who contributed questions. I hope you all enjoyed it.

findmypast first

The webinar is currently only available to Findmypast First (annual subscribers) members, but in a few days it will be posted onto the Findmypast YouTube channel at https://www.youtube.com/user/findmypast/videos.

In answering the questions, I realised I need to post a lot more here on the blog, so to give you a glimpse of what my posts will be about in the next few weeks, here are some of the questions that were asked and answered in brief on the day, but I will answer more fully in my blog posts.

  • How secure is the Family Tree?
  • Can I import trees I’ve created through Ancestry? And from Mac Family Tree?
  • Can I import direct from Family Tree Maker?
  • Will importing GEDCOM data merge it with what I’ve already entered into find my past, or will it duplicate it?
  • What is GEDCOM?
  • If I build my family tree then don’t renew my subscription can I still see it?
  • When will tree sharing/viewing be available?
  • Can I invite an family member who does not belong to Findmypast to look at my tree?
  • Will you be adding Census hints? Will hints be available on other than just BMD?
  • Will hints still be accessible if a subscription has lapsed?
  • Are original images of records attached, or just transcriptions?
  • Do you have hints available on internments of foreign nationals during the wars?
  • When creating a Family Tree should I use my married surname or my maiden name?
  • If a woman has been married more than once what is the best way to see her maiden name and other married names?
  • If you do not know the maiden name for a woman should it be left blank as previously I used ‘unknown’?
  • Can I as the owner of tree remove it from Findmypast?
  • How do you show multiple parents in the case of adoption?
  • If I enter information on a burial does it automatically realise that person is dead, for display purposes, or privacy?
  • Why doesn’t the source of the record appear next to the event? They all seem to be verifying the name?
  • When will you have a feature to print a tree or part of?
  • Is there a download guide for the Findmypast Family Tree?
  • Is there a guide to show me how to attach photos to tree?
  • Why can I only see 3 generations in family view?

And thank you for some of the really pleasant comments. Here’s a few.

  • Very helpful – thanks!
  • Most worthwhile and looking forward to more.
  • This looks a very interesting and powerful tree construction utility you have developed. I especially like they way you capture all the sources.
  • Can I just say this is my first time with webinar and I found it a rewarding experience and look forward to the next one.
  • Thanks for your help this afternoon. I think the hints option is a great help.
  • Thank you. Very informative and look forward to more. Have just bookmarked your blog and look forward to reading it.
  • Interesting to be able to see other people’s questions/answers, some that I wouldn’t have thought of.
  • Look forward to uploading my tree in the near future.

I’ve got a bit of a challenge to get these posts put together and out for you to read on “In The Green”.

Until then, Happy Easter to you all!

What’s new on Findmypast Family Tree?

It’s been a little while since I posted an update about the Findmypast Family Tree and I feel very lazy for not having written, but the team here have been far from lazy. We had our busiest and toughest schedule to date pre-Christmas, and I am glad to say that the team delivered to target with the beta release and first phase of Findmypast Hints on the 15th December.

I will devote an entire blog (maybe two) to Hints, but just to give those who may be unfamiliar with them, I will give a brief explanation.

While you are building your family tree, you may divert your focus to search for records on Findmypast. You take the information you have gathered and retype certain elements, in the hope of finding a birth record or a marriage or something else. With Hints, we take the initiative for you, and take the data you have entered, and in the background try to make the best search we can. Sometimes this will use information you have entered on related people to help narrow down the possibilities.

Hint bubbles on family view

If we think we have found records that may be relevant to you, we will create a Hint, indicated by a orange circle on your person nodes, which can then be viewed in more detail on profile page.

Hints on a profile

But the process is a bit more than that. We don’t just direct you to the record, we present the record in a format that matches the format you would see in your family tree. We show matches, differences and new information, and then let you merge it easily into your own tree, along with copying source information where it is available.

Hint review page

The best thing with Findmypast Hints is that the process is not limited to subscribers. Yes there will be information on a record that you will need to subscribe to see, but most of the core information on birth, marriage and death records is free to see and merge. And as you merge this information, the Hints will once again work away in the background looking for more Hints to give you.

In one month, we have created 1 million Hints for Findmypast Family Tree people, and this comes only from people adding to and editing their trees, and a few limited number from GEDCOM imports. You really have to have a go building your tree, and see what Hints can find for you.

Currently Hints are being generated only for birth, marriage and death records, but we are searching across ALL record sets in these categories, regardless of the record set size.

This has certainly been our primary focus for the last 3 months, but we’ve been working on other items as well, that are now available on the Findmypast Family Tree.

  • ZIP upload for media
  • GEDCOM improvements
  • Media edit includes location and date
  • Media edit now in modal
  • Fact type list display description, date and place
  • Chronological order option on facts and events
  • Added year/place specific Census fact types
  • Added email fact type

Upload zip of media

We’ll continue to evolve the main Family Tree product at a rapid pace in 2015, with phase 2 of Hints being rolled out as soon as features are ready. This will include Census Hints, and then other record sets. We will include backfilling Hints so that we hopefully uncover some interesting finds on the people in your tree that you’d maybe forgotten about. There are improvements to the merge screen coming very soon, that will allow you to add sources even when the fact information matches, or edit the fact to blend both the record and your own data, or create an alternative fact altogether.

We are looking to improve the views that are currently available, and hopefully offer more. And then there are the list pages, that are integral to those who want to check and tidy up their data, or see issue lists where we identify issues or inconsistencies in your family tree data, such as parents born before children.

Rest assured that the team here will not be resting, and will be working on your behalf to give you an even better Family Tree in 2015.

If you have any suggestions for what you’d like to see, then feel free to leave a comment here.

Thanks once again for reading my posts.


Preparing your photos – merging two scans

I recently received an enquiry from a Findmypast family tree user about uploading scans, and I noticed only half of the birth certificate was scanned. This is not uncommon, since certificates are printed on paper that is awkwardly a little longer than an A4 page, which is even longer than Letter size (for any North American readers), which is the limits of most home scanners.

Don’t despair, there is an easy solution to merging scans into one image file, and I will try to explain the steps here.

Please note, the software I use is a free package that I am familiar with, but there are many other free and paid for packages that you could use. The principles of the process described will be the same.

I have chosen to use Paint.Net. It is simple and free, although they do appreciate donations to help with development costs. It is however a Windows product, so not suitable for Mac or mobile tablet, except Surface. It can be downloaded from here, http://www.getpaint.net/download.html Warning when you get to the PDN download page, don’t click on the big green button, go to the link on the right.

001a - download paint dot net

After downloading and installing, your ready to go.

First you need to scan you’re document, if you’ve not already done so. Try to line it up against the baseline corner the scanner. It doesn’t matter which way round you scan as we can correct that later. But it helps to get it matching the edge. After you have scanned one side, flip the document 180 degrees around, and scan again. You should now have two images with a distinct area of overlap, albeit one will be upside down.

001d - census combined parts

Open the two images in your image application. Take the one that has the left portion first. If it is upside down, then you need to rotate the image by 180 degrees. This is under the Image menu option. In my example this is not needed for the left portion.

001f - rotate image


Now you need to expand the “canvas”. This is the area that the image covers. Still on the Image menu option, you will see Canvas Size … the ellipsis is a standard Microsoft Windows indicator that a options window will follow.

001g - increase canvas size

The existing size is shown. We will over estimate and increase the size to 1000 pixels wide, and just to cover any slight variation in height, we will increase slightly to 500 pixels. I will also make sure that the size changes are to the right, and above and below, by selecting the middle left square for an anchor position.

001g - new canvas size

I now need to open the second and ensure that is in the right rotation. In my case it is upside down so I sue the rotate 180 degrees mentioned above.

On this second image, now in an upright position, I then choose Select All (CTRL+A) from the Edit menu. And still on the Edit menu, I select Copy (CTRL+C).

I flip back to the first image, use the open image selector at the top, or ALT+TAB.

001h - open image selector

Once the larger first image is back in focus, from the Edit menu, I select the Paste into new layer. This is very important as this will allow you to shift the image into position. Initially, after pasting, the second image will appear anchored to the top left corner and highlighted with a dotted line.

001i - new layer

When you hover over the pasted layer, you will get an arrowed cross. Click down and hold down and then drag your mouse. As you drag the mouse the image will move. If you are careful, you will be able to shift the second image into a position where the overlap covers the original image below.

001j - overlapped new layer

Now you want to trim the excess. I use the rectangle select option from the toolbox. This is the icon in the top left corner of the tools.

001k - toolbox

I start by clicking in the bottom right hand corner of the image where I want to start the trimming. I click down and hold, and drag the mouse all the way to the top left hand corner.

001l - trim select

The from the Image menu, select Crop to selection. You now have the blended image. I normally choose Save As at this point and give it a new name (AND REMEMBER to save as Jpg, not the default Pdn format), so that if I have to repeat the process I can. Once saved, you can close the images and your image application.

You now have a single image from two separate scans. I hope you found this post helpful. If you have any suggestions for improvement, please leave me a comment.

Thank you


Uploading media to tree in IE8 and IE9

Are you using Internet Explorer 8 or 9, then please read on for some useful tips on media handling in the Findmypast Family Tree. Unfortunately these browsers are unable to support some of the more advanced browser features, such as HTML5, which allows web developers to build more advanced and user friendly websites. One particular feature that suffers most is the area of uploading media. As a result we have built an alternative method, and I explain how to use it here.

Uploading a new media file

If you go to the Media section of any profile, or the Media section under settings, you will see an Upload a file option with a Browse button.

IE89 - 001a -upload a new image

Click the Browse button to select the file. A file open dialog will appear, and you should browse to the folder where your photos are and select one file. Click on open.

IE89 - 001b -upload a new image

It will immediately start to load. When loading is complete, you will then be able to edit the details of your photo. The photo is already saved, but this allows you to save a new title and/or description, and select the photo for a profile picture.

IE89 - 001c -upload a new image

Complete these details and hit Save and you will be returned to the Media page with the new photo listed first.

IE89 - 001d -upload a new image


Attach a profile photo

Unfortunately, the upload new does not work from the profile image, so your either best to just upload a media as above and choose set to profile first time around or you can attach to an existing image if the image already exists.

IE89 - 002a -attach existing

Choose Use existing, and you will be directed to an image picker page. IE89 - 002b -attach existing

The most recent 20 images are shown. Either you can select one of these, or click load more at the bottom of the page, or you can use the filter to narrow down your search.

IE89 - 002c -attach existing

Then click on the image you want to use and save. This will then place the selected image into all the profile spots for the chosen person.

IE89 - 002d -attach existing

And that’s it. Hope this helps.

Starting over – part 2 – Adding a profile photo

Okay, so last time we started creating our tree once more – or should I say 5 times more. The sites I have chosen to use are Ancestry, TheGenealogist, MyHeritage, Findmypast and Genes Reunited. So far, I have created my root person (me), and populated with very basic information, that I obviously know. And now, I just want to add a little colour, so I thought let’s start by adding a profile photograph. I will start the process by choosing a nice simple solo portrait of myself.

Philip Gordon Moir

Genealogist – I wasn’t sure where to look, so hovered over the person node in the pedigree view. Just as I was looking down the list of options and just before I chose edit individual, a new tool tip appeared over the person’s silhouette, for adding an image. This opens up a modal with a choose file selector. I select my picture and upload. A few seconds later, and the pedigree view refreshes with my photo in place.

TG - 003 - add profile photo - combined

Findmypast – OK, so this doesn’t have a nice simple tool tip that pops up, and instead when clicking on the node in the family view, and get a modal that gives me various options, including “Their tree”, “Profile”, “Edit”, etc. , but nothing about adding a profile image. I suppose I may be editing the person, so click through to edit. Nothing here, and nothing when I hover over the male icon. There is a (small) link to full profile in the bottom right hand corner. I try this and I’m taken to the main profile page. This time when I hover over the male icon in the top left, I get the pencil (edit icon) appearing, and clicking on this gives me two options, upload new or use existing. I could be picky, and say that I have no images loaded so why suggest use existing, but after the first one is loaded, you’ll always have both options. I obviously select upload new, which takes me straight to the file selector. I choose my image,select open, the findmypast spinner rotates in the profile icon slot, and then the Add details page is shown. This lets me add a title and a description, and the check box to set this image for the profile picture is already checked. It has taken the file name for both title and description. While the title is fine, I decide to be more explicit about the description. It’s a little limited on fields, but okay for just now. Click save, and then I’m back to the profile, once again with a lovely circled portrait of myself.

FMP - 003 - add profile photo - combined

Ancestry – This works very similar to TheGenealogist, in that initially the hover over gives you a modal of options, but then, if you hover over the silhouette on the modal,you get the tool tip to add a primary photo. Ancestry is never short on options, and there are a few on the page that greats you. But before you add your files, there is a disclaimer to accept for “I accept the Terms & Conditions and the Content Submission Guidelines”. These are actually worth reading. The T&Cs are general for the site, but the submission guidelines directly relate to the images, videos,audio and stories that you might upload. Although in principal the same rules and guidelines apply to the other sites, it helps that there are clear links to this documentation before you upload. I check the T&Cs option, and choose “Select Files”. In this case I only want one,and when I click on Open, like FMP this takes me straight to a details page for more information to be added. This provides a few more fields, such as date and location, and also has an attach to other people option. On saving, I get taken back to the pedigree view, once again, with a little picture of myself displayed.

ANC - 003 - add profile photo - combined

MyHeritage – This seems to be the simplest. A small (actually it is pretty small!) camera below the male icon on the family view, when hovered over tells you to add photo. A modal appears with upload a photo to Philip Moir, and a choose file button. I select my file, click open and immediately a copy of the image appears. And then I can click upload. A spinner appears briefly, and then my profile is in place on the family view. Very quick. Only gripe is that I didn’t get the chance to add more detail, but since the exercise was to add a profile shot, then that is exactly what I was able to do.

MYH - 003 - add profile photo - combined

Genes Reunited – And lastly once again to Genes Reunited. This is a little awkward, but it is worth bearing in mind that Genes Reunited has a concept called Keepsafe that lets you store photos outside of your tree, and also the tree runs in a separate tab from the main site, so you will most likely have two browser tabs open. In the tree view there is nothing obvious on the person node. The edit panel slides out from the right, and the second tab along says photos, and when clicked there is an upload button. Clicking on the upload button appears not to do anything on the face of it, but in fact the action is happening on the other tab. Switch back to the main site, and you will see the Upload to Keepsafe modal has opened with the ubiquitous choose file button. I select my file, and then click on the file chosen – click next button. I enter a mini wizard at this stage, and am prompted for a title, which is pre-populated with the file name, and category. On uploading, like FMP and Ancestry, I am presented with an editable details page. This by far gives the most options. Not only is their title, description, date and location, I can add tags, set privacy options, add private notes, attach to multiple people and even select a folder to save the image in. I save the changes and am viewing the non-edit version of the image details page, but I’ve not really set the profile. It’s not obvious, so I will just guide you. In the My Information box, my name is a link, click on this to go to the media section of the person’s profile. Now hover over the item in the media panel, and click on the Set Profile Photo button. Now you can choose what part of the image to use for the profile. Although this is a very long winded route to setting the profile, this is the first site that has let me choose a part of the photo for the profile. In this case I leave it as the default top square.

GR - 003 - add profile photo - combined

There you go, the simple and the less than simple. But even the less than simple options have their benefits.

Next time I will look at adding more information to the profile.