Maiden names, marriages and parents

During my recent webinar for Findmypast First, which will be available at http://www.findmypast.co.uk/video-library very soon, and after chatting to family history enthusiasts at Who Do You Think You Are Live, a number of questions were asked on a variety of subjects. I will be writing a series of blog posts to cover the questions and will offer my best advice to answer them. In this blog, I’d like to cover the discussion point of using maiden or married names, multiple marriages and multiple parents.

When creating a family tree should I use married surnames or maiden names?

In general, I would recommend adding all people to your tree with the name they were born with. Therefore in the case of women who married, enter them with their maiden name. The primary reason for using this format is that automated searching, hints and tree to tree searching will be improved as we can locate records that match maiden names, but we can also infer the married name when looking for marriage and death records, when a spouse has been linked.

More about names

However, please remember that the tree is flexible, and you can enter an unlimited number of name facts against a person in your tree. The primary name is the Full Name fact, and this one is used in all displays across the tree. If you add a Nickname fact, then this will be included in the name displayed across the tree, and will be shown in double quotes. There are other name fact types, such as Married Name (most people don’t bother to include this because you can infer this from the spouse, but if you want to include it then that’s fine, especially if it is coming from an official source).

maiden-name-nickname

Profile showing maiden name and nickname

The other name facts include, Also Known As, Maiden Name, Other Name, Phonetic Variation and Romanised Variation. You are not able to create custom name facts.

In terms of sourcing names, if there are variations in the spelling, I would personally recommend saving these as “alternative” Full Name facts along with any relevant sources. Then you can always refer back to where exactly all the different name variations came from.

If a woman has been married more than once what is the best way to see her maiden name and other married names?

If you are using the “maiden” name as the primary Full Name, then the tree will always display this across all views. If you choose to include married names, then I would recommend including these as Married Name facts. You can always go to the Married Name fact usage report to see what married names have been applied.

married-name-fact-usage

Use of the married name fact, showing the person and the married name under description

If you do not know the maiden name for a woman should it be left blank as previously I used ‘unknown’?

It is up to personal preferences. I personally leave unknown given names (first names) and surnames (last names) blank if I don’t know them. Some programs like the Genes Reunited tree put Unknown automatically into your tree when a surname is not specified. I think it helps when searching to leave it blank so that any search engines are not restricted to names like “Unknown”. This reminds me I need to clear up the Sarah in the example above.

How do you show multiple parents in the case of adoption?

This is very similar to a couple of questions I’ve had from a support request. (1) How do I add an adopted child to a Family Tree? and (2) How do I add Adopted Parents to a Family Tree already showing child & biological parent?

The Findmypast tree does not offer a straight forward way to add a second set of parents but it can be done. There is a good reason for this, and that is because it helps prevent people adding multiple parents accidentally. Therefore as soon as yo have added a mother and father, we don’t offer these in the normal add relative modal.

However, we do realise that some people want to build a family tree, and show that a person has both biological parents as well as parents who through adoption or fostering (or for various other reasons) , so this is how to do it.

add-biological-parents

Standard one set of biological parents on Relations tab

Start by creating a person and then add parents as you would normally do. Go to the relations tab, and you will see that the first set of parents have been created a biological parents.

add-new-person

Add an unrelated or unconnected person to your tree from People list

You can then add an “unattached” person to the tree, via the People list page. And then go their Family View (only one person on show) and you can add a relative (spouse or child). In this case I’ll add a spouse first and then add a child after.

select-parents-for-child

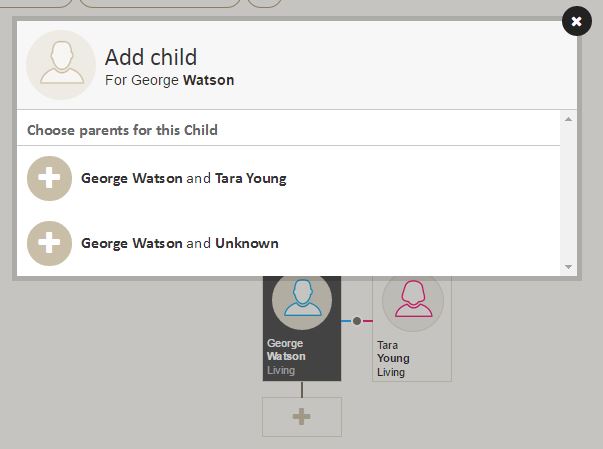
Select the parent or parents

You’ll be asked to select the parents for the child. In this case I select George and Tara.

add-new-child

Add a child, but choose “select someone from your tree”

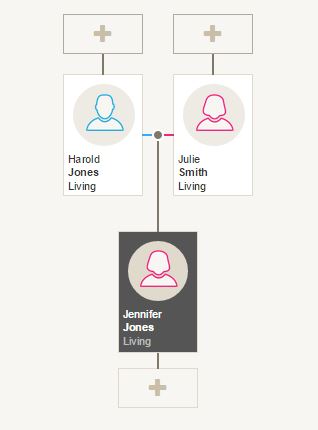
At this point you’ll be presented with a new person form. But don’t enter details. Click on the link at the top of the form that says “Select someone from your tree”. You will have the standard person search form, and in this select the child you want to attach to the new parents. In this case we choose Jennifer Jones (who already has biological parents added). Now don’t be worried that the family view has not added Jennifer. This is because these are not the primary parents.

person-search

Search for a person in the tree

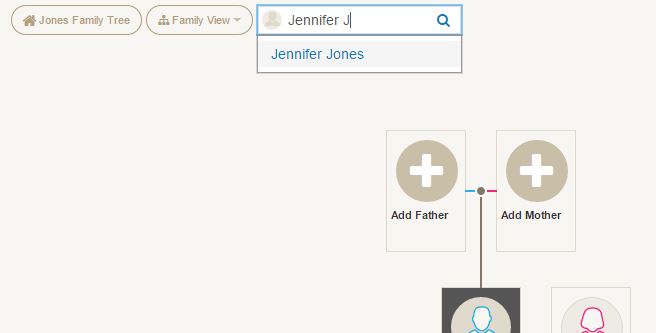
If we use the person selector at the top to search for Jennifer  Jones, and then click on the name that appears in the result, it will switch to Jennifer Jones’ Family View.

preferred-family-view

Only “preferred” parents include child on primary views

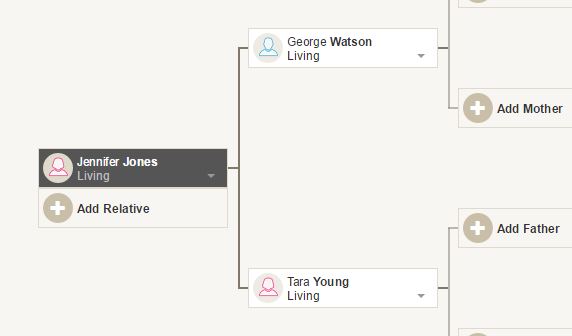
Now we can switch to the Relations tab under the Profile View, and we can see both parents listed.

multiple-parents

Two sets of parents show on the Relations tab

The second set have not had the relationship selected, but we can edit this here.

relationship-options

List of relationship options

All the views, except for the Relations tab, will only display the preferred parents. To switch the views to use the other parents, then go to the relations tab and change the preferred parents to the alternative ones. Do this by selecting the “Set Preferred” option under the Parents label on the left.

The preferred parents will always show on top on this tab, and will have switched over when you clicked the set feature. When you look at all the other views, they will now display with the adopted parents (in this case).

preferred-parents-changed

Adopted parents now showing by default

I hope this has helped clear up a few queries about names, parents and setting relationships. If you have any questions, feel free to add a comment at the end of this post. I will update this blog if anything needs further explanation or more detail.

Thank you for reading, and if you haven’t already been tempted to, please click to follow my blog and be informed when new posts are available.

Who Do You Think You Are Live 2015

Just wanted to post a quick update from Birmingham, where the 2015 Who Do You Think You Are Live show is being held. It has been a great first two days, with the Findmypast stand very busy. In fact the first day was so busy, a few of us didn’t even get a chance to take a break during the whole day.

findmypast-stand

It is great to see so many people turning out and with such enthusiasm despite everyone having brick walls to break down. We, and I mean the family history community, may not be able to solve all the puzzles that are coming our way, but we’re certainly having fun trying. It’s really the first time I’ve had a chance to demonstrate the power of the tree and hints together, and show how to ignore search and let the tree do the searching for you.

I’ve had the chance to present my Introduction to the Findmypast Family Tree a couple of times so far, and looking forward to the final presentation tomorrow. I’m afraid it’s not ground breaking genealogy comedy like that provided by Tony Robinson, but it will give you a very good insight into the Family Tree tool we now have available on Findmypast. And I’ve got to introduce the new release of Hints which includes Census records from all over the UK, Ireland and America.

Today I managed to escape the stand for a couple of walkabouts, taking the opportunity to explore some of the other amazing products and services that are on offer to the family historian, and I will blog about some of these in the future.

But for now, with one more long day to go, I need a little rest.

I haven’t forgotten about the questions that came up from the webinar (which I will link to as soon as it is publicly available), and I will start to blog them next week, along with a few repeated requests from visitors to the stand, such as how to export your GEDCOM from other websites, how to upload media to the tree and what is the security on the tree.

Best wishes and thanks for reading, Phil

I’ve lost my tree!

“I understand that you are having problems with your tree and believe you have lost all the people that you have entered.”

Every week a see a few requests come in with the same panicked concern. I’ve lost my tree. My tree has disappeared. In almost every case this is far from the reality and the solution is usually quite simple, but it is understandable for someone who is not entirely familiar with the Findmypast family tree tool. I thought this was about time that I posted instructions on how to resolve this. The following is a copy of an email I sent to one customer, but the advantage of this blog is that I can add plenty of screenshots.

~~~

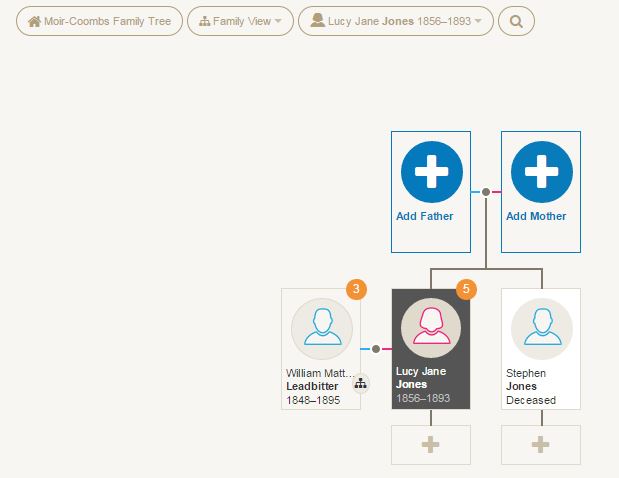
I can reassure you not to worry. Your tree is still in tact. I suspect you had just moved the focus to a person who was either at one end of your tree or had been disconnected.

lost-my-tree-1

let’s say that I am going to work on Stephen

Quite often when working on a tree you add a few people, and then at some point you remove either a connecting person or a connecting relationship.

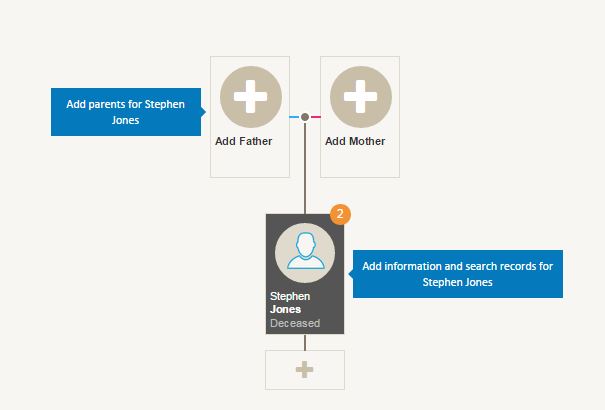
lost-my-tree-2

turns out Stephen was not Lucy’s brother so I’ll remove him from the family

This may leave just one person visible on your screen, and the temptation is to fear that the whole tree has vanished.

lost-my-tree-3

“Oh! Where’s my tree gone?” – please, please do no panic

There are two quick ways to check that this is not the case.

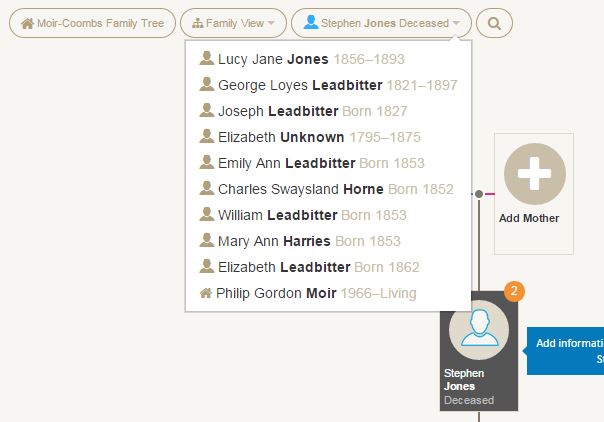
lost-my-tree-4

your history of the people you’ve worked on and home person at bottom

The first is to switch back to the home person. To do this click on the third oval box from the left at the top of the tree view. This is a history of people visited in your tree, and the bottom one is always the home person. Click on this and the tree will reset back to this person.

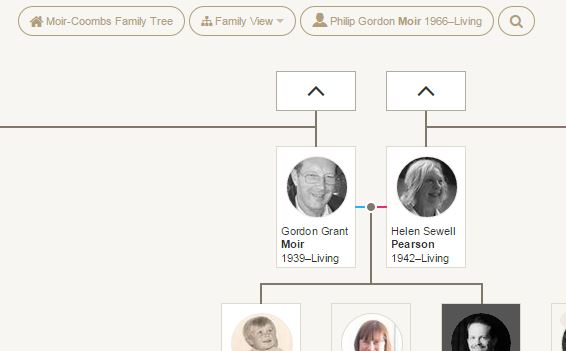
lost-my-tree-5

back to home person

The reason that the tree does not do this when you reload each time, is because most people when working in their tree on distant branches want to jump back to the last person they worked on when they reopen their tree, rather than having to navigate back on each occasion. But jumping back to the home person is so easy by using the history link.

lost-my-tree-6

link to people list

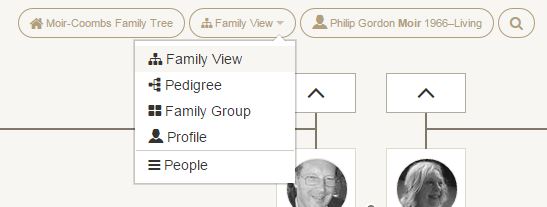
The second way is to select the People list from the bottom of the second oval box from the left at the top of the screen. This will tell you firstly how many people you have in your tree (the main reassurance that your tree has not been wiped) and then list the first 20 people. You can filter, sort and page through this list, and the buttons on the right hand side of each person row let you jump to the Family, Pedigree, Group and Profile views for that person.

lost-my-tree-7

check people count, and jump to a person

I hope this proves helpful.

Thanks again for reading my blog, and please tell anyone else that uses Findmypast or has considered using Findmypast to take a look at our tree software. It doesn’t cost anything to build your tree, no matter what the size is.

What’s new on Findmypast Family Tree?

It’s been a little while since I posted an update about the Findmypast Family Tree and I feel very lazy for not having written, but the team here have been far from lazy. We had our busiest and toughest schedule to date pre-Christmas, and I am glad to say that the team delivered to target with the beta release and first phase of Findmypast Hints on the 15th December.

I will devote an entire blog (maybe two) to Hints, but just to give those who may be unfamiliar with them, I will give a brief explanation.

While you are building your family tree, you may divert your focus to search for records on Findmypast. You take the information you have gathered and retype certain elements, in the hope of finding a birth record or a marriage or something else. With Hints, we take the initiative for you, and take the data you have entered, and in the background try to make the best search we can. Sometimes this will use information you have entered on related people to help narrow down the possibilities.

Hint bubbles on family view

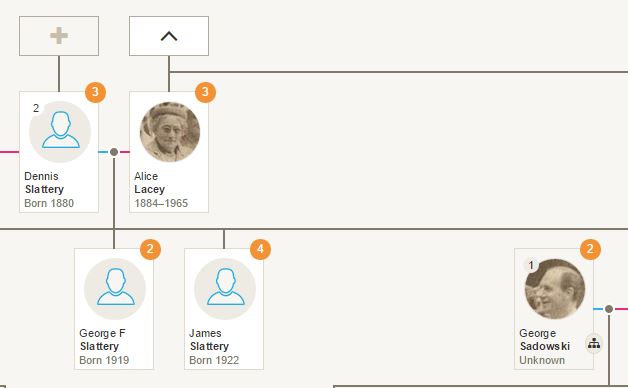
If we think we have found records that may be relevant to you, we will create a Hint, indicated by a orange circle on your person nodes, which can then be viewed in more detail on profile page.

Hints on a profile

But the process is a bit more than that. We don’t just direct you to the record, we present the record in a format that matches the format you would see in your family tree. We show matches, differences and new information, and then let you merge it easily into your own tree, along with copying source information where it is available.

Hint review page

The best thing with Findmypast Hints is that the process is not limited to subscribers. Yes there will be information on a record that you will need to subscribe to see, but most of the core information on birth, marriage and death records is free to see and merge. And as you merge this information, the Hints will once again work away in the background looking for more Hints to give you.

In one month, we have created 1 million Hints for Findmypast Family Tree people, and this comes only from people adding to and editing their trees, and a few limited number from GEDCOM imports. You really have to have a go building your tree, and see what Hints can find for you.

Currently Hints are being generated only for birth, marriage and death records, but we are searching across ALL record sets in these categories, regardless of the record set size.

This has certainly been our primary focus for the last 3 months, but we’ve been working on other items as well, that are now available on the Findmypast Family Tree.

  • ZIP upload for media
  • GEDCOM improvements
  • Media edit includes location and date
  • Media edit now in modal
  • Fact type list display description, date and place
  • Chronological order option on facts and events
  • Added year/place specific Census fact types
  • Added email fact type

Upload zip of media

We’ll continue to evolve the main Family Tree product at a rapid pace in 2015, with phase 2 of Hints being rolled out as soon as features are ready. This will include Census Hints, and then other record sets. We will include backfilling Hints so that we hopefully uncover some interesting finds on the people in your tree that you’d maybe forgotten about. There are improvements to the merge screen coming very soon, that will allow you to add sources even when the fact information matches, or edit the fact to blend both the record and your own data, or create an alternative fact altogether.

We are looking to improve the views that are currently available, and hopefully offer more. And then there are the list pages, that are integral to those who want to check and tidy up their data, or see issue lists where we identify issues or inconsistencies in your family tree data, such as parents born before children.

Rest assured that the team here will not be resting, and will be working on your behalf to give you an even better Family Tree in 2015.

If you have any suggestions for what you’d like to see, then feel free to leave a comment here.

Thanks once again for reading my posts.


Preparing your photos – merging two scans

I recently received an enquiry from a Findmypast family tree user about uploading scans, and I noticed only half of the birth certificate was scanned. This is not uncommon, since certificates are printed on paper that is awkwardly a little longer than an A4 page, which is even longer than Letter size (for any North American readers), which is the limits of most home scanners.

Don’t despair, there is an easy solution to merging scans into one image file, and I will try to explain the steps here.

Please note, the software I use is a free package that I am familiar with, but there are many other free and paid for packages that you could use. The principles of the process described will be the same.

I have chosen to use Paint.Net. It is simple and free, although they do appreciate donations to help with development costs. It is however a Windows product, so not suitable for Mac or mobile tablet, except Surface. It can be downloaded from here, http://www.getpaint.net/download.html Warning when you get to the PDN download page, don’t click on the big green button, go to the link on the right.

001a - download paint dot net

After downloading and installing, your ready to go.

First you need to scan you’re document, if you’ve not already done so. Try to line it up against the baseline corner the scanner. It doesn’t matter which way round you scan as we can correct that later. But it helps to get it matching the edge. After you have scanned one side, flip the document 180 degrees around, and scan again. You should now have two images with a distinct area of overlap, albeit one will be upside down.

001d - census combined parts

Open the two images in your image application. Take the one that has the left portion first. If it is upside down, then you need to rotate the image by 180 degrees. This is under the Image menu option. In my example this is not needed for the left portion.

001f - rotate image


Now you need to expand the “canvas”. This is the area that the image covers. Still on the Image menu option, you will see Canvas Size … the ellipsis is a standard Microsoft Windows indicator that a options window will follow.

001g - increase canvas size

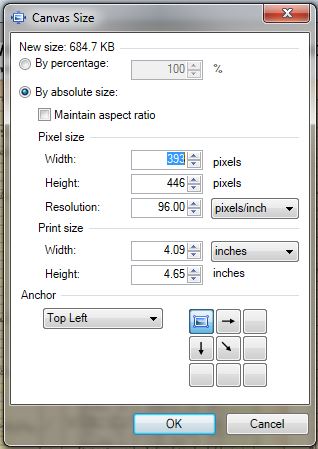
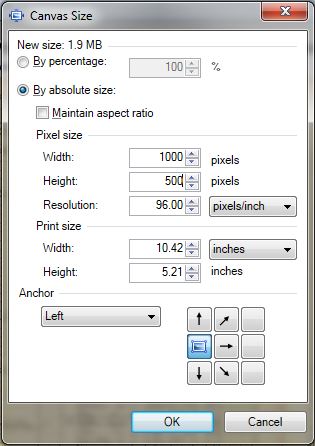
The existing size is shown. We will over estimate and increase the size to 1000 pixels wide, and just to cover any slight variation in height, we will increase slightly to 500 pixels. I will also make sure that the size changes are to the right, and above and below, by selecting the middle left square for an anchor position.

001g - new canvas size

I now need to open the second and ensure that is in the right rotation. In my case it is upside down so I sue the rotate 180 degrees mentioned above.

On this second image, now in an upright position, I then choose Select All (CTRL+A) from the Edit menu. And still on the Edit menu, I select Copy (CTRL+C).

I flip back to the first image, use the open image selector at the top, or ALT+TAB.

001h - open image selector

Once the larger first image is back in focus, from the Edit menu, I select the Paste into new layer. This is very important as this will allow you to shift the image into position. Initially, after pasting, the second image will appear anchored to the top left corner and highlighted with a dotted line.

001i - new layer

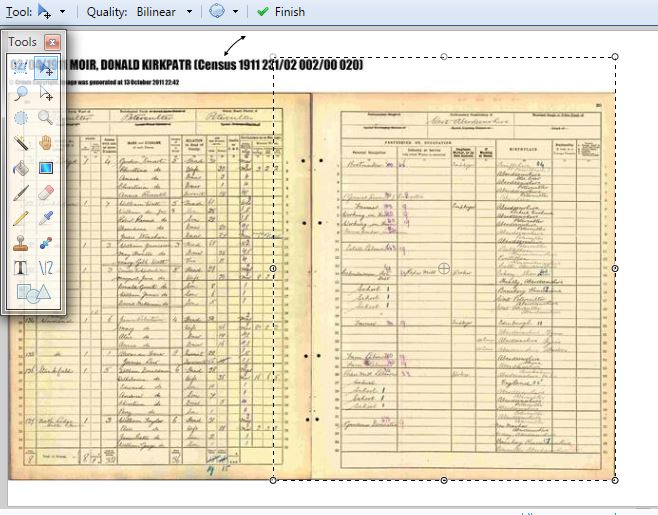
When you hover over the pasted layer, you will get an arrowed cross. Click down and hold down and then drag your mouse. As you drag the mouse the image will move. If you are careful, you will be able to shift the second image into a position where the overlap covers the original image below.

001j - overlapped new layer

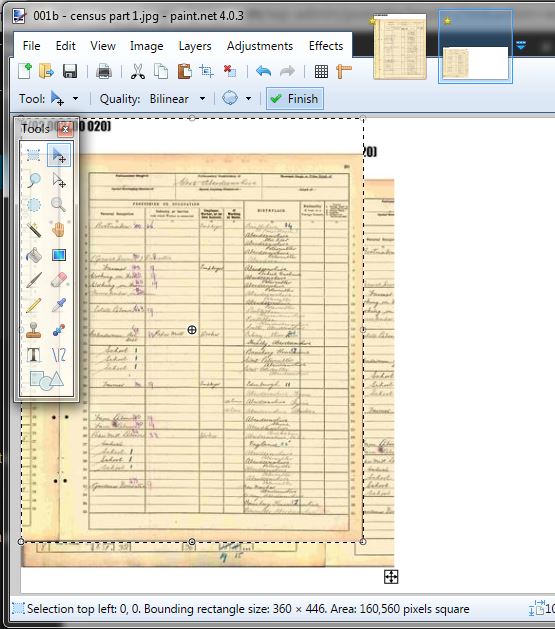
Now you want to trim the excess. I use the rectangle select option from the toolbox. This is the icon in the top left corner of the tools.

001k - toolbox

I start by clicking in the bottom right hand corner of the image where I want to start the trimming. I click down and hold, and drag the mouse all the way to the top left hand corner.

001l - trim select

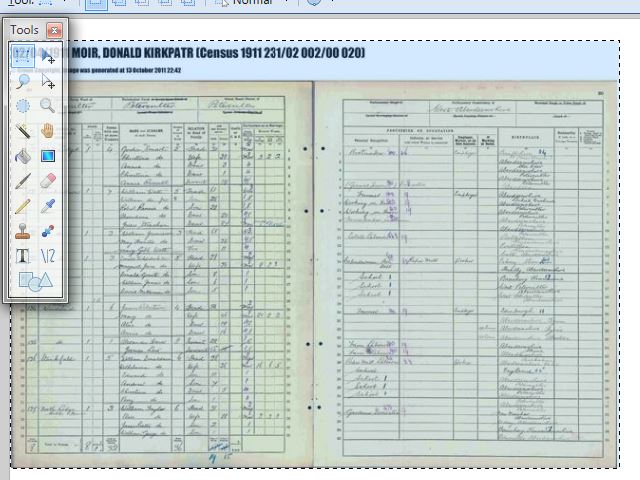
The from the Image menu, select Crop to selection. You now have the blended image. I normally choose Save As at this point and give it a new name (AND REMEMBER to save as Jpg, not the default Pdn format), so that if I have to repeat the process I can. Once saved, you can close the images and your image application.

You now have a single image from two separate scans. I hope you found this post helpful. If you have any suggestions for improvement, please leave me a comment.

Thank you


Starting over – part 2 – Adding a profile photo

Okay, so last time we started creating our tree once more – or should I say 5 times more. The sites I have chosen to use are Ancestry, TheGenealogist, MyHeritage, Findmypast and Genes Reunited. So far, I have created my root person (me), and populated with very basic information, that I obviously know. And now, I just want to add a little colour, so I thought let’s start by adding a profile photograph. I will start the process by choosing a nice simple solo portrait of myself.

Philip Gordon Moir

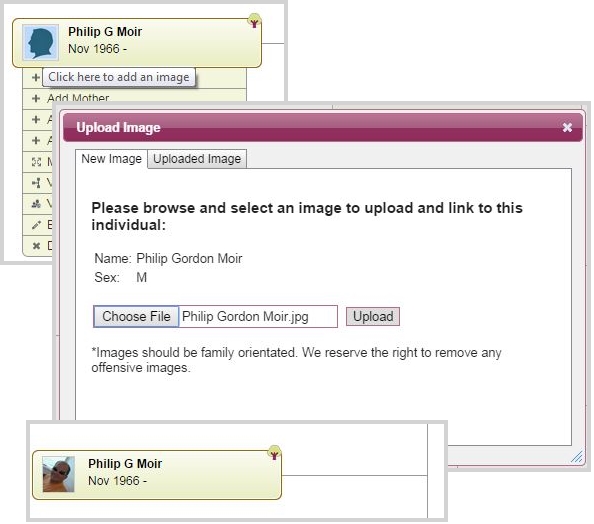
Genealogist – I wasn’t sure where to look, so hovered over the person node in the pedigree view. Just as I was looking down the list of options and just before I chose edit individual, a new tool tip appeared over the person’s silhouette, for adding an image. This opens up a modal with a choose file selector. I select my picture and upload. A few seconds later, and the pedigree view refreshes with my photo in place.

TG - 003 - add profile photo - combined

Findmypast – OK, so this doesn’t have a nice simple tool tip that pops up, and instead when clicking on the node in the family view, and get a modal that gives me various options, including “Their tree”, “Profile”, “Edit”, etc. , but nothing about adding a profile image. I suppose I may be editing the person, so click through to edit. Nothing here, and nothing when I hover over the male icon. There is a (small) link to full profile in the bottom right hand corner. I try this and I’m taken to the main profile page. This time when I hover over the male icon in the top left, I get the pencil (edit icon) appearing, and clicking on this gives me two options, upload new or use existing. I could be picky, and say that I have no images loaded so why suggest use existing, but after the first one is loaded, you’ll always have both options. I obviously select upload new, which takes me straight to the file selector. I choose my image,select open, the findmypast spinner rotates in the profile icon slot, and then the Add details page is shown. This lets me add a title and a description, and the check box to set this image for the profile picture is already checked. It has taken the file name for both title and description. While the title is fine, I decide to be more explicit about the description. It’s a little limited on fields, but okay for just now. Click save, and then I’m back to the profile, once again with a lovely circled portrait of myself.

FMP - 003 - add profile photo - combined

Ancestry – This works very similar to TheGenealogist, in that initially the hover over gives you a modal of options, but then, if you hover over the silhouette on the modal,you get the tool tip to add a primary photo. Ancestry is never short on options, and there are a few on the page that greats you. But before you add your files, there is a disclaimer to accept for “I accept the Terms & Conditions and the Content Submission Guidelines”. These are actually worth reading. The T&Cs are general for the site, but the submission guidelines directly relate to the images, videos,audio and stories that you might upload. Although in principal the same rules and guidelines apply to the other sites, it helps that there are clear links to this documentation before you upload. I check the T&Cs option, and choose “Select Files”. In this case I only want one,and when I click on Open, like FMP this takes me straight to a details page for more information to be added. This provides a few more fields, such as date and location, and also has an attach to other people option. On saving, I get taken back to the pedigree view, once again, with a little picture of myself displayed.

ANC - 003 - add profile photo - combined

MyHeritage – This seems to be the simplest. A small (actually it is pretty small!) camera below the male icon on the family view, when hovered over tells you to add photo. A modal appears with upload a photo to Philip Moir, and a choose file button. I select my file, click open and immediately a copy of the image appears. And then I can click upload. A spinner appears briefly, and then my profile is in place on the family view. Very quick. Only gripe is that I didn’t get the chance to add more detail, but since the exercise was to add a profile shot, then that is exactly what I was able to do.

MYH - 003 - add profile photo - combined

Genes Reunited – And lastly once again to Genes Reunited. This is a little awkward, but it is worth bearing in mind that Genes Reunited has a concept called Keepsafe that lets you store photos outside of your tree, and also the tree runs in a separate tab from the main site, so you will most likely have two browser tabs open. In the tree view there is nothing obvious on the person node. The edit panel slides out from the right, and the second tab along says photos, and when clicked there is an upload button. Clicking on the upload button appears not to do anything on the face of it, but in fact the action is happening on the other tab. Switch back to the main site, and you will see the Upload to Keepsafe modal has opened with the ubiquitous choose file button. I select my file, and then click on the file chosen – click next button. I enter a mini wizard at this stage, and am prompted for a title, which is pre-populated with the file name, and category. On uploading, like FMP and Ancestry, I am presented with an editable details page. This by far gives the most options. Not only is their title, description, date and location, I can add tags, set privacy options, add private notes, attach to multiple people and even select a folder to save the image in. I save the changes and am viewing the non-edit version of the image details page, but I’ve not really set the profile. It’s not obvious, so I will just guide you. In the My Information box, my name is a link, click on this to go to the media section of the person’s profile. Now hover over the item in the media panel, and click on the Set Profile Photo button. Now you can choose what part of the image to use for the profile. Although this is a very long winded route to setting the profile, this is the first site that has let me choose a part of the photo for the profile. In this case I leave it as the default top square.

GR - 003 - add profile photo - combined

There you go, the simple and the less than simple. But even the less than simple options have their benefits.

Next time I will look at adding more information to the profile.


Starting over – building you tree from scratch

This weekend I decided to revisit the 5 main subscription based websites offering family tree tools that let you create your own private family tree, and start creating my tree on each from the beginning. I wanted to look at the weaknesses and positives of each. I have excluded Family Search and Wiki Tree as they are “one” tree websites, and that is not the focus of this challenge.

The five chosen are Findmypast, Genes Reunited, Ancestry, The Genealogist and MyHeritage. You may have other choices, but these are the ones I am most familiar with and the ones I would consider spending money on to look at records. The option for building a family tree on each of these is FREE. That is the basics of tree creation and research storing. On some of the 5 sites there are options that cost, but on others these options are free.

Let’s start from the point that I have registered a FREE account on each of the five, and I’ve clicked on the various Create Tree option.

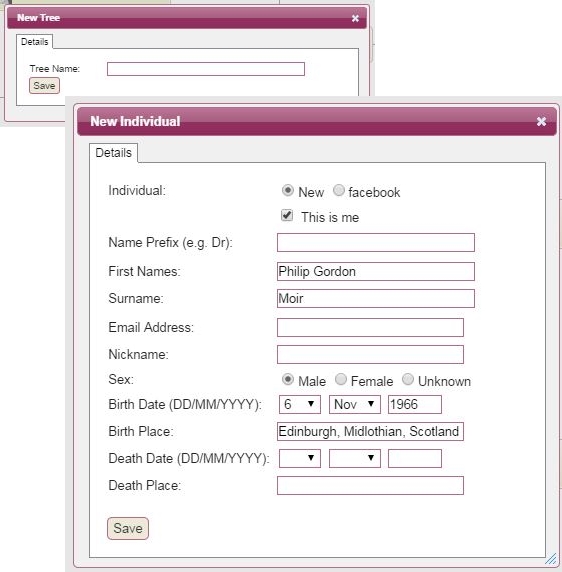
Genealogist – First I must name the tree and save. I’m then given an empty pedigree view with two options of either adding an individual or importing a GEDCOM. I chose to add an individual. I can now enter name and birth details, gender, indicate if it’s me, include email address. Death options are also active. The date selector is fiddly and expects a “date” – so option for maybe or about is not there. It also does standardise the date, but after I have clicked save. The modal was small and well packed, but I could see all the fields presented. The location has not suggestions. I click save and am taken to the pedigree view, with add mother and add father very visible. Not sure about tree privacy at this stage.

TG - 001- start tree - combined

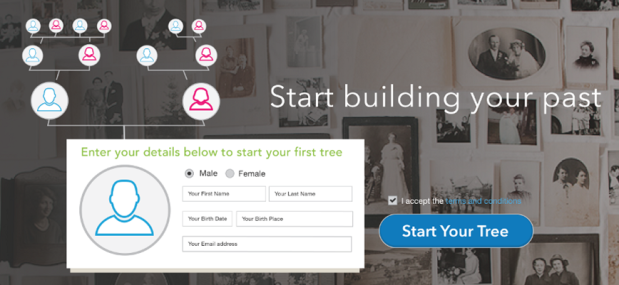
Findmypast – Here I have to immediately enter my starting person with name, birth details, gender and living or deceased, indicate if it’s me, and it preselects a tree name for me, which I can override. Death options are visible but disabled until flagged as deceased. There is a public tree option – unselected by default. Good, as I may want to consider making it public at a later date, but for the time being I keep it private. There was a tool tip on the public tree option, but it was a little sparse on explanation. Bonus, it standardised my date into a neat format, and gave me location options as I typed, although the chosen location was a little long winded in text. The size of the modal for creating the tree was taller than my laptop so I had to scroll to see all the fields. After saving I am taken to the family view with add parents above and a plus below.

FMP - 001 - start tree

Ancestry – I am straight into the pedigree view, with the empty levels shown, and add new person at the root. I click on add person, and get a clear and clean modal with all fields visible on screen, starting with the it’s me indicator (pre-selected). As I complete each field available, I get a tick box to indicate it’s complete (or correct – not sure) except the Birthplace. The death options don’t display until you indicate deceased. It asks me to click Continue, but interestingly I still haven’t created the tree. Before I can fully create the tree, I need to go further. I don’t want to add more details at this point but am forced to (first time I tried to just go to the tree it didn’t save what I’d previously entered and it was lost. So I click on add father with surname pre populated, and am forced to choose between living or deceased, and then click continue. I can now name my tree although it is also pre populated with surname suggestion again. It has pre-selected “Allow others to view this tree”, which I don’t believe is the best choice for a beginner, so I have to remember to remove this option, and save. Now I’m on the pedigree with add mother from me, and add parents from my minimalist details father. ANC - 001 - start tree - combined

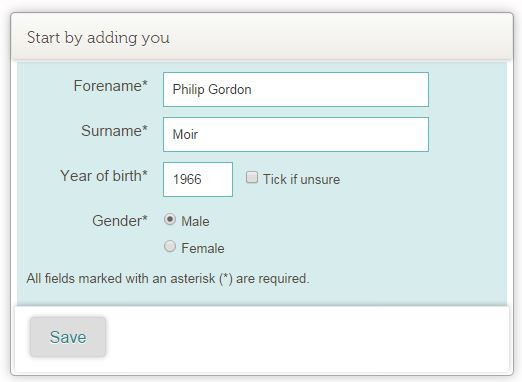
MyHeritage – The create on-line family tree form pre populates my name, gender and year of birth from my registration details, but I have to add in my middle name, and I cannot enter my date of birth, only the year. The location field was the smallest of all so far, and there was no place suggestion. I also have fields for my mother and father’s name and their email addresses. I don’t want to do this now so just click go. Oops, like Ancestry I have to add my father’s surname. Err,a bit odd, as it could have actually pre populated it, but okay, so I fill in my father’s surname. And hit go. Like The Genealogist, I’m not sure about tree privacy at this stage. After this I am left on the Family view with two nodes, plus signs of each, and a side panel on the left to see more of the focus person.

MYH - 001 - start tree

Genes Reunited – Very simple starting modal, with names, birth year and gender. No location, no privacy options. After saving, I end up with Family view, and add mother and father nodes. The edit panel is on the right, but hidden from view by default.

GR - 001 - start tree

Check security settings

Okay, some of the family trees offered me the security options up front, but I want to set the others, and I want to check the options on all. At this stage,I don’t want to make my tree public, so here’s what you need to do.

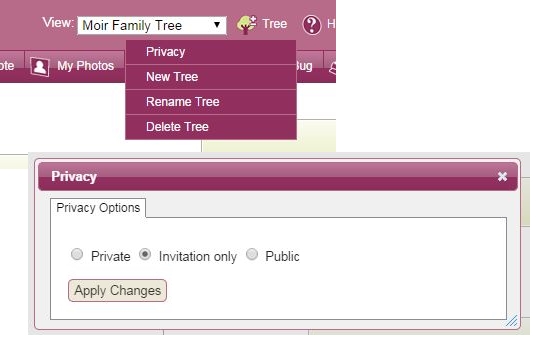
The Genealogist – It took a moment to work out where to go, but the menu item for the Tree was the correct obvious choice, and top of the list was Privacy sub menu. The privacy choices are plain and simple,private, public and invitation only. Although there is no explanation of what the choices mean. I choose private as it seems most secure. There was no mention of living relatives being hidden in shared trees.

TG - 002 - privacy - combined

Findmypast – The cog leads to tree settings, and this exposes a few more options in addition to privacy. I can set the home person, can set who I am, change the name of the tree, and then there are 2 privacy options. Show living – and a tool tip attached to a side question what’s this? explains about allowing others to see living relative details and only use when sharing with known family. Public tree – and the attached question why should I make my tree public? explains that it allows you to connect more easily with others. Actually, setting to public or private doesn’t stop you connecting, it just means people can look at your tree without explicit permission. It’s worth noting that if you do choose public tree, you can not set show living. Good measure to prevent setting both on by accident. I leave both blank. No need to save as I made no changes, so cancel back to the tree.

FMP - 002 - privacy - combined

Ancestry – The tree pages menu seems a bit oddly named, but leads to the tree settings option. This has three tabs and the second one is privacy settings. Here there is a detailed explanation of what the privacy options are, what they mean, and how it will affect your experience. There is even a link to an additional page explaining their privacy policy. This is very good and sets an information benchmark that all genealogy sites should strive for. There is a also an option to hide your tree from searches. This seems to be everything you might need.

ANC - 002 - privacy - combined

MyHeritage – Take the manage trees option under the family tree tab, to first see a summary of all the trees you have, and to get access to the edit tree settings. This is an interesting alternative page of settings,and one that is definitely worth mentioning. MyHeritage promotes multi ownership of family trees, even suggesting that successful sites encourage members to participate and add content. Having dealt with a lot of genealogy website users and their concerns and issues over privacy and ownership, I don’t necessarily agree. But at least you have the options. I switch off allow site members to download the family tree, and also switch the edit permissions to only you (me). Although the link to privacy is on this page, I click save to make sure my changes go through, and I’m back to manage trees. Return into edit settings, and through to privacy settings. I’m a little over whelmed and confused by the settings on offer. Each setting has an “i” icon, that provides detailed explanation of each option. It’s a little confusing  as there is no simple public or private option. It feels like being searchable and allowing others to view my tree is interlinked into the first option. Erring on the side of caution, I switch off the include in search, and allowing photos to be copied, but leave on the two smart matching options. Click save, and then I notice the my member preferences and access links to the left.  The member preferences is less about the tree and more about me, so I leave them as is. The one of importance is the access page. The first three options all look innocent, so I leave them on. I decide to switch off the option to allow site members to invite other members to my site, and also switch off all the options for guests to view limited data on my site (without my permission). The last option for authenticated apps having access sounds secure too, so I leave the option on. Quite a handful. Maybe too much, but then I cannot complain as I’ve been given the options, if only I understood exactly what they meant.

MYH - 002 - privacy - combined

Genes Reunited – Genes have taken all the hassle and concern of public access away from you, by simple offering only the “private” option. That is to say all trees on Genes Reunited are searchable for matches, but  you must contact the owner before being given explicit permission to view their tree. There is one element that is worth mentioning, and it is maybe buried in an unlikely place. Bearing in mind you can only have one tree, the option is found under your account settings (and not the tree). Down near the bottom is hide living relations. It defaults to no, so I would recommend switching to yes for those that want to remain  most secure.

GR - 002 - privacy - combined

Well that’s about it for a first look at starting your tree and setting the privacy options. I will continue to evolve my tree on each of the sites, taking a critical and complimentary look at each of the features on offer.

Next time I look at adding a profile image.

Findmypast Family Tree – one year old this week!

Findmypast Family Tree – one year old this week!

Before you start searching for records. Before you start looking at transcriptions or images. Before you subscribe or invest any money. You will want to start building your family tree and recording your ancestral heritage.

For the last 18 months Findmypast have been working hard to build a new Family Tree builder that is clear and simple to use, but also includes advanced features for more experienced genealogists. But more importantly, is FREE to create and keep, no matter what the size, no matter how many images you want to attach, and also regardless of whether or not you have a subscription.

We appreciate that members want to build trees for a variety of reasons. Whether that be to add colour to one’s ancestral stories and past. Whether that be to solve historical puzzles or prove or disprove the family myths. Or whether that be just to create a lasting legacy for your descendants. There are many more reasons, but we also want the experience to be fun, and free from stress.

This week is the 1st anniversary of the launch of the new Family Tree builder on Findmypast. And we’re pleased to say we’ve come a long way in that time, and appreciate that there are still many more things we need to include, but now is a really good time to come in, take a look and start building YOUR family tree!

There are two options on getting started with your family tree. One is to start from scratch, normally with yourself on the Create a Tree page, or if you already have a tree created online or in a desktop product, you can export a GEDCOM file that can be uploaded to Findmypast.

Once started, there are four main views of your tree.

Screen Shot 2014-09-26 at 15.15.07

The Family view which shows a focus person, their parents, siblings and children, aunts and uncles, cousins along with spouses and children. This can be quite big!

Screen Shot 2014-09-26 at 15.15.48

The Pedigree view is more traditional and shows a focus person, and then 3 generations of ancestral parents, that is parents, grandparents and great grandparents.

Screen Shot 2014-09-26 at 15.16.11

The Family Group view shows focus person, spouses, children and parents of both the focus person and their spouse(s).

Screen Shot 2014-09-26 at 15.16.31

And finally, and the view you will probably end up using the most, the Profile view. This is like a personal page for each relative you have in your tree, and great for seeing all the detail of a person in one place.

Screen Shot 2014-09-26 at 15.16.53

This page is split into several tabs, but starts with something akin to a covering sheet. It’s an Overview page that gives a small glimpse into the bulk of the information you will end up collecting about each person.

Screen Shot 2014-09-26 at 15.17.08

The Timeline lists key events in the persons history, including events such as their birth, marriage, children and sadly, when they passed away.

Screen Shot 2014-09-26 at 15.17.21

The Things to investigate panel gives you a link to search results for your ancestor that has been optimised for the best results across all Findmypast records.

Screen Shot 2014-09-26 at 15.17.32

There is even a calculate relationship feature, that lets you find the relationship between any two people in your tree.

Screen Shot 2014-09-26 at 15.40.59

On the Fact & events page, you can add unlimited facts about a person, with over 100 core fact types, and the ability to create custom facts. These facts help to paint the story based timeline feature seen on the overview. In addition, you can attach to any fact unlimited sources, photos, notes and links to other people.

Screen Shot 2014-09-26 at 15.42.32

You can upload photos and attach to people or events. You can even attach the record transcriptions and images to people so that they can be referred to as sources and linked back easily from the profile pages.

Screen Shot 2014-09-26 at 15.19.54

To help you manage some of the data in your tree there are lists covering the people, facts, master-sources and more.

We have a number of features in the pipeline, including hints and record merging, sharing your tree with family and friends, but kicking off the birthday celebrations, we have given the tree a new lick of paint so to speak. This new look has been carefully designed to make it clearer and more colourful.

We hope you like the fresh new look, and hope you enjoy building your family history with the Findmypast Family Tree.

FamilyTree - start building

Phil Moir

Technical Lead – Findmypast Family Tree Team

Attach Records – new feature

The second piece added this week to the jigsaw, more commonly known as the Findmypast family tree, was the ability to attach records.This has been eagerly awaited by many users, and in fact was one of the highest voted for tree features on the http://feedback.findmypast.co.uk  forums. The concept is simple. You find a record transcription and / or image and you want to save them to your tree, or more specifically attach them to the relevant person(s) in your tree. Either for a permanent record, or to review and merge data later.

AttachRecords - start your search

There are a number of places where you might start searching for records, but for this example, lets start with the profile page of someone in your tree. This also gives me the chance to mention some improvement tweaks we made to the “Search” link in the Things to investigate section. Following a great 4 part series of blog posts by Randy Seaver about the Findmypast family tree at http://www.geneamusings.com/2014/08/family-trees-on-findmypastcom-post-1.html, we took on board his suggestions and tweaked this link to give the best search for a person across all Findmypast records. I thoroughly recommend trying this as the starting point for any general search of people in your tree as this will not only bring up the obvious record sets, it may well uncover the less obvious.

AttachRecords - search results

Without any need for filling out complex search screens, we’re taken straight to the most likely matches for our person. Note that these results open in a new browser tab. There is good reason for this as it lets you flip back and forth between records and your tree. From the example shown, we’ve got two probable matches at the very top of the results.

AttachRecords - view transcription

In this instance, I’ve clicked through to the transcription.

AttachRecords - attach to tree

Next to the Print and View Image buttons, is a new Attach to tree button. The button also appears at the bottom of the page, as well as on image pages. At the moment, this option is not available on articles from the British Newspaper Archives. Click on the button to open the attach modal window.

AttachRecords - attach modal

The attach record to tree modal is fairly simple. However,if you don’t have a tree already, you need to go back to the tree builder to create one. If you only have one tree, then the name of the tree will be shown.

AttachRecords - select tree

If you have multiple trees, then a tree selector is shown. It is important to pick the right tree, as only people from the selected tree will appear in the following type ahead. Of course, this does not stop you from selecting from one tree and then from another. Just remember to switch the selected tree.

AttachRecords - person name type ahead

After selecting the tree, just start typing in the person(s) field. You can use any of the given names, surname, nickname or even the year of birth or year of death. When you see the person you want in the list, just click on the name.

AttachRecords - private note

The name will appear highlighted, with a cross beside it. This allows you to remove it from the list, if you selected in error. You can always detach a person from the record at any time later. You can also attach as many people as you like to any record. After attaching the people you want, there is also a separate section to add a private note about a record, that is only relevant to your tree.

AttachRecords- confirmation

After clicking on the Save button, a confirmation box will appear indicating that you have successfully saved the record to the selected person(s) or from who you have detached the record. Close this window to return to the record. Any time you return to this record this information will be available. And you can add, edit or remove the attachments and notes later.

NOTE: Remember to attach both the transcription and the image to your tree.

AttachRecords - attached media

When you return to your tree and the profile for a person you attached the record to, click on the Media tab on the Profile page. Here you will find the attached record. You can click through from here directly back to the transcription or image. You can also now attach the record to specific facts and events, by using the attach existing option when adding media.

This is obviously a very popular addition with over 18,000 records and images now attached to trees. So what are you waiting for? Time to start trawling the massive collection of records that Findmypast has, and attach them to your tree.

Let us know what you think of this new feature and how you would like it improved.

Reagrds

Phil

GEDCOM Export – new feature

This week saw two NEW and exciting features being launched for the Findmypast Family Tree. This one is the second phase of a long term project to integrate the GEDCOM standard protocol for transferring your tree data between the Findmypast Family Tree platform and other genealogy packages. Findmypast appreciate that some users are familiar with other packages, and each one has different benefits, and all the mainstream desktop and online Family Trees offer GEDCOM compatibility for both importing and exporting trees, and we’re very pleased to now join this group. We are also aware that many users want to take personal backup copies of their data to store offline, or they want to share their tree with people who use other products.

So to complement GEDCOM import which we launched back in February this year, we have now launched GEDCOM export. The export release corresponded with some tweaks to the GEDCOM import to capture some data fields that we had missed, and the export process itself aims to return all the data that was included from an import, even though not all of the data in some imported GEDCOMs is shown yet in your Findmypast tree.

ExportGEDCOM - tree list

To kick off the export, go back to your tree list. You can reach the tree list by clicking on the View all trees menu item.

ExportGEDCOM - export tooltip

You will now see a new icon, slotted in between the tree settings and delete tree icons. This is the export option. For the moment the process will export your full tree in GEDCOM 5.5.1 format. No need to worry about this detail, as most applications that support GEDCOM will match this.

ExportGEDCOM - preparing gedcom

While the export process is running, your tree will be locked, so you cannot access and make changes. Don’t worry, the export is pretty fast, so you shouldn’t have long to wait.

NOTE: The process runs on the Findmypast servers in the background so you don’t have to stay on this page while the export is created. If you have a large tree, feel free to go and do more record browsing, and when you comeback to the tree list, the status of your export will be shown.

ExportGEDCOM - creating gedcom

Also while the process continues, you will see the tree status message update to give you an indication of how far through the process the export is. If for any reason, the export hits a problem, the tree will be unlocked and you can continue to work on your tree. Meantime, the Findmypast technical team will be aware of the problem and this will be investigated.

ExportGEDCOM - gedcom ready

When the process completes, the tree status will indicate that the export has been created and howlong it took. The tree will become active again, and a new link will be shown under the tree icons on the right hand side.

ExportGEDCOM - download link

The “Download tree” text is the link to physically download the file to your local computer. Click on this, and depending on your browser the file will either automatically save to your Downloads folder or you will be asked where to save the file. This is where you will be able to find the file when you want to import it to another package or to re-import it back into Findmypast.

ExportGEDCOM - file downloaded

The download tree link will remain visible until you alter the tree again, so don’t worry about it disappearing in the short term.

NOTE: Please be aware that while Findmypast make every effort to import your full GEDCOM file and then re-export the same without any loss of data, you may find some data loss when importing to and exporting from other family tree packages. If you do notice any data loss during the Findmypast processing, then please feel free to let us know and we’ll get it fixed as soon as we can.

We’re also looking at other tweaks to the export, and more will be posted on that when they are available.

Thanks again for reading this blog.

Phil

PS The second feature released this week was “Attach Records”. I will post about this later.